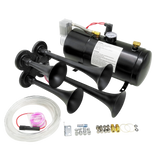
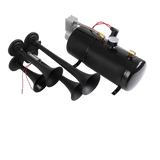
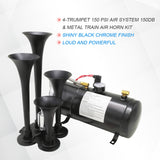
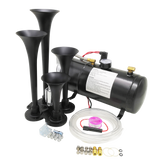
JDMSPEED 150DB 4 Trumpet Air Train Horn 150 PSI Air Compressor Kit For Car Truck 12V
Features:
100% brand new and high quality
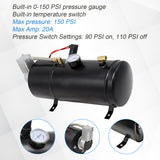
Pressure Switch Settings: 90 PSI on, 110 PSI off
Overall size: 470mm (L)*435mm (W)* 215mm (H)
Max pressure: 150 PSI
Max Amp: 20A
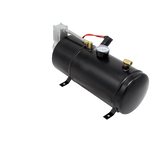
Tank Overall size: 390(L)*140(W)*180(H)mm
Tank capacity: 3 Liters
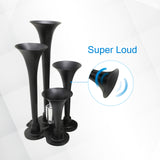
Trumpet length: 165mm, 230mm, 295mm, 350mm
Duty cycle: 15%
Trumpet width: 90mm
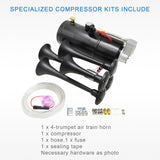
Package includes:
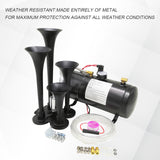
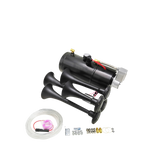
1 x 4-trumpet air train horn
1 x compressor
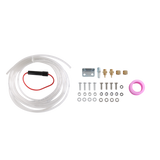
1 x hose
1 x fuse
1 x sealing tape
Necessary hardware included
Notes: No instruction included, professional installation is highly recommended
Installation Tips:
HORN MOUNTING
Identify a suitable area for mounting, preferably an unobstructed sheet-metal surface like the frame or body of the vehicle so as to provide a firm platform which will help protect the horn from damage due to shaking.
Never attach the horn to any plastic or other flexible material.
Mark the spots for the holes with the bracket and then drill.
The mounting hardware should be used to fasten the horn
AIR LINE INSTALLATION
On one side of the included 1/4" OD air line, attach the compression nut and force the air line upon the male inlet fitting which is found on the electric solenoid valve.
Pass the brass nut through the inlet fitting and fasten.
Take the air line’s other side and place the compression nut of the air tank fitting on it. Force the air line onto the male fitting of the tank and then fasten the compression nut. WARNING: Avoid over tightening.
ON-BOARD AIR SYSTEM MOUNTING
Determine a dry place to mount your on-board air system. If you have chosen to install in the engine compartment, you should mount it as close to the front as possible to allow for maximum flow of air around
compressor and also to avoid heat from the exhaust.
IMPORTANT: Never attach the system to any plastic or other flexible material.
For optimal results, the compressor should be placed as close to the battery as possible. This will reduce the amount of wiring needed.
Avoid placing compressor near flammable liquids.
For proper heat dissipation of the compressor never install the on-board air system upside down.
Mark the spots for the holes with the mounting base as a guide and then drill. Make sure the system is secured.
CHECK VALVE
The check valve is an important part of the air compressor and has only one function: to let air flow from one side to the other, in this case from the compressor to the tank, while blocking air flow in the opposite direction.
IMPORTANT: Do not rotate or remove the inline check valve located at the end of the hose on the side that connects to the air tank. Doing so will damage its seals and will result in damage to your air compressor.
THERMAL OVERLOAD PROTECTION
The compressor has Thermal Overload Protection, if this protection activates, cut off the source of power and let the unit cool down for about 30 minutes. This will reset the system and allow you to safely resume use of the air compressor.
PRESSURE SWITCH RATING
The included pressure switch has a rating of 90 PSI ON, 110 PSI OFF. When the air pressure in the air tank is below the preset ON pressure (90 PSI), the compressor will automatically turn on and will start pumping air into the tank. When the pressure reaches the cut OFF pressure (110 PSI), the compressor will be automatically shut off.
In this system your Pressure Switch is already wired to the air compressor. Do not modify this connection.
AIR PRESSURE GAUGE
Your system includes a 150 PSI Pressure Gauge that will measure the air pressure of the tank.
The air pressure gauge is a sensitive part of the system, please avoid dropping, hitting or tighten it to the tank using a method other than the brass nut located in the back.
SAFETY VALVE
Your system comes with a safety valve designed specifically to release pressure from the air tank automatically if 200 PSI is exceeded. This will help prevent an accident in case of pressure switch failure.
DRAIN NUT
This nut helps you drain the water that can collect in the air tank after long periods of use.
REMOVING CONDENSATION: To remove any condensation which has accumulated inside the tank, bleed the tank’s pressure until it ranges from approximately 5 PSI to 20 PSI.
Remove the drain nut found at the tank’s bottom to drain the water from the tank. After draining the accumulated condensation, apply thread sealant to the nut’s thread and reinstall it.
IMPORTANT: Draining the system regularly will extend the life of the air tank。
ELECTRICAL CONNECTION
ON-BOARD AIR SYSTEM
The red wire of the on-board system coming from the pressure switch should be connected using the provided fuse to (+) 12-volt power source.
IMPORTANT: To prevent the compressor from over running and possible damage due to an air leak, connect the compressor’s red wire to a power source in the vehicle that only gets power when the vehicle’s ignition is on. Recommended connection points are: windshield wiper motor, blower motor or an accessory terminal on the fuse panel. Make sure to use wire that is as heavy as the wire of the compressor.
The black wire of the on-board system coming from the pressure switch should be connected to ground. The ground connection should be rust and paint free.
Your compressor is now set for use and will turn on automatically when air pressure in the air tank falls. When air pressure reaches maximum PSI, it will turn off. If the compressor fails to reach the maximum air pressure of the tank, which is the Pressure Switch's cut OFF pressure, check all air connections for leaks. While the compressor is pumping, use soapy water or any bubble solution to perform this check. In case the leak remains after tightening, re-apply thread sealant.
IMPORTANT: Never touch fittings, braided hose or the air compressor with bare hands either during or shortly after use.
HORN (SOLENOID)
USING NEW HORN BUTTON
Connect one of the electric valve’s wires to the positive (+) terminal of the battery, alternator, etc. This circuit should be protected using a 10A fuse (not provided).
Connect the second electric valve wire to one of the Horn Button’s connections. The remaining connection of the Horn Button must be connected to ground.
USING VEHICLE’S HORN SWITCH
First, determine the switch’s polarity. The horn of most vehicles sends a negative (-) signal which can be confirmed by connecting one of the probes from an ohm meter to the wire of the horn while connecting the other one to ground. The meter should be at zero. This proves that horn circuit is negative (-). In case the meter reads anything other than zero ohms, test for voltage between the wire of the horn and the 12-volt reading would mean a positive (+) horn circuit.
Once you know the horn circuit’s polarity, connect any of the solenoid wires to the horn wire.
If you have a negative horn circuit, connect the remaining solenoid wire to a constant 12-volt power source.
If you have a positive horn circuit, connect the remaining solenoid wire to ground.


